
Smith Island Cake Recipe – The Ultimate Maryland Cake Recipe You’ll Want to Bake Again and Again
When you decide to make a Smith Island cake recipe, you’re not simply mixing flour and sugar. You’re recreating a coastal tradition that has been passed from kitchen to kitchen for generations. Each thin layer tells a story of patience, care, and celebration. And once you slice into those delicate stacked layers covered in glossy chocolate icing, you understand why this cake is more than dessert — it’s heritage on a plate.
Born on Smith Island, tucked inside the waters of the Chesapeake Bay, this iconic layered cake was officially named the state dessert of Maryland in 2008. But long before it received that honor, families were baking it for holidays, birthdays, and community gatherings.
Now, you can bring that same tradition into your kitchen.
Table of Contents
What Is a Smith Island Cake?
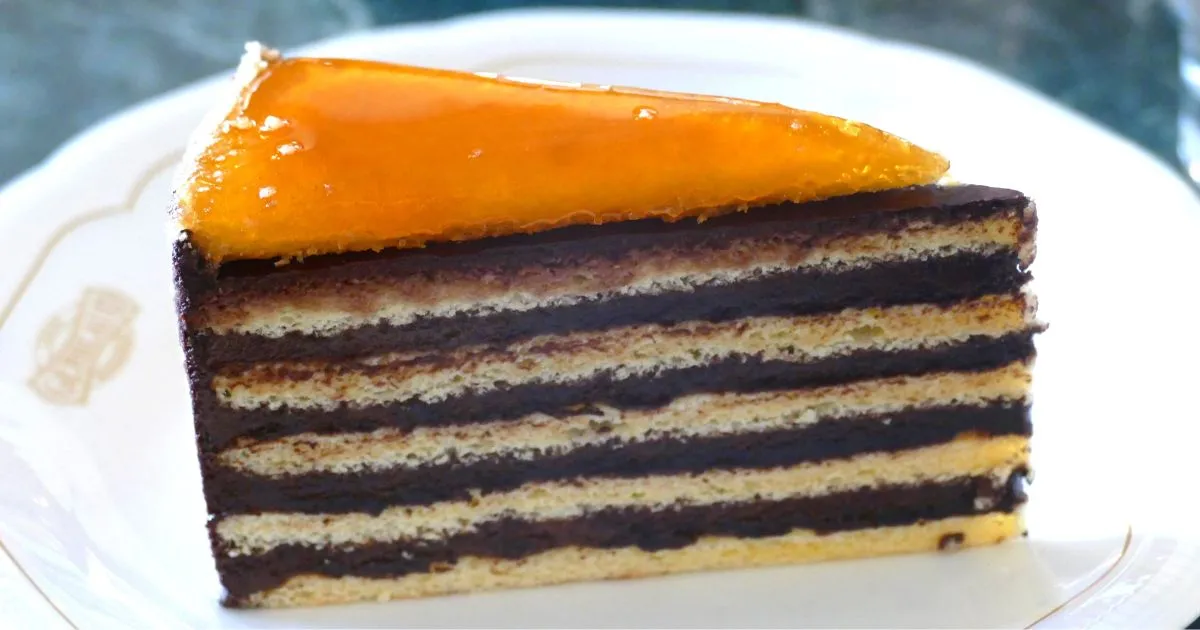
A traditional Smith Island cake recipe features 8 to 15 ultra-thin cake layers, stacked carefully with a rich chocolate fudge frosting between each one. Unlike standard layer cakes that rely on thick sponge layers and fluffy buttercream, this cake is defined by its elegance and balance.
Here’s what makes it unique:
- Multiple paper-thin yellow cake layers
- Cooked chocolate fudge icing (not buttercream)
- A fully frosted exterior, sealing in moisture
- Best flavor achieved after resting overnight
Historically, watermen’s wives on Smith Island baked these cakes because thin layers baked quickly in modest ovens. The chocolate icing helped preserve the cake for days — a practical solution that turned into a beloved tradition.
Why You’ll Love This Smith Island Cake Recipe
You don’t need a special occasion to bake this cake. Once you taste it, you’ll find your own reasons.
1. The Texture Is Unlike Any Other Cake
Because the layers are so thin, every bite melts evenly. You don’t get overwhelming cake or overwhelming frosting — just perfect balance.
2. It Feeds a Crowd
With 10+ layers stacked high, this cake slices beautifully and serves many guests. It’s ideal for:
- Family gatherings
- Holiday dinners
- Birthday celebrations
- Community events
3. It Gets Better Overnight
Unlike many desserts that dry out, this cake improves after resting. The frosting slightly softens the layers, creating a tender, unified texture.
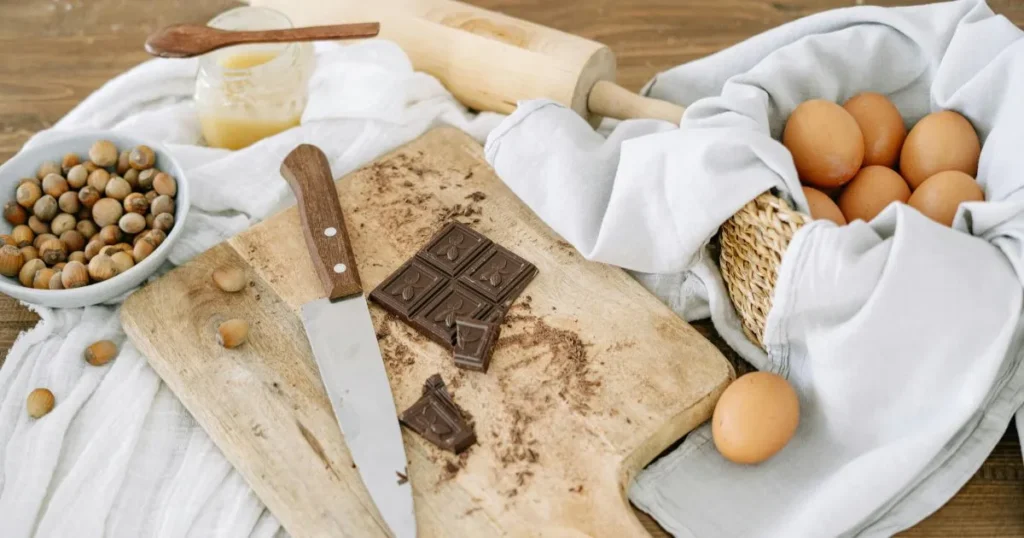
Ingredients for the Authentic Smith Island Cake Recipe
Precision matters here. Use room-temperature ingredients and measure carefully to keep your layers consistent.
Cake Layer Ingredients
| Ingredient | Quantity | Why You Need It |
|---|---|---|
| All-purpose flour | 3 cups | Structure and stability |
| Baking powder | 2 teaspoons | Gentle lift |
| Salt | ½ teaspoon | Balances sweetness |
| Unsalted butter (softened) | 1 cup | Richness |
| Granulated sugar | 2 cups | Sweetness and structure |
| Large eggs | 5 | Binding and moisture |
| Whole milk | 1 cup | Smooth batter consistency |
| Vanilla extract | 2 teaspoons | Flavor depth |
Traditional Chocolate Fudge Frosting Ingredients
| Ingredient | Quantity | Purpose |
|---|---|---|
| Evaporated milk | 1 (12 oz) can | Creamy base |
| Granulated sugar | 2 cups | Sweet structure |
| Unsweetened cocoa powder | ½ cup | Deep chocolate flavor |
| Unsalted butter | 4 tablespoons | Shine and smoothness |
| Vanilla extract | 1 teaspoon | Aromatic finish |
For best results, choose high-quality cocoa powder. Since the frosting defines this cake, flavor matters.
Step-by-Step Smith Island Cake Recipe Instructions
Take your time. The beauty of this cake lies in its layers.
Step 1: Prepare Your Pans
- Preheat oven to 350°F (175°C).
- Grease and line multiple 9-inch round pans.
- If you only have two pans, rotate batches.
Pro tip: Weigh your batter for evenly sized layers.
Step 2: Make the Cake Batter
- Cream butter and sugar until light and fluffy (3–4 minutes).
- Add eggs one at a time, mixing thoroughly.
- Combine dry ingredients separately.
- Alternate adding flour mixture and milk to the batter.
- Stir in vanilla.
The batter should be smooth and slightly thick but spreadable.
Step 3: Bake Ultra-Thin Layers
- Spread about ¾ cup batter per pan.
- Smooth evenly to edges.
- Bake 8–10 minutes.
- Layers should be lightly golden, not browned.
- Cool completely before removing.
Repeat until all layers are baked. Aim for 8–12 layers.
Step 4: Prepare the Chocolate Fudge Frosting
- Combine evaporated milk, sugar, and cocoa in a saucepan.
- Cook over medium heat, stirring constantly.
- Simmer until slightly thickened (about 8 minutes).
- Remove from heat and add butter and vanilla.
- Let cool until spreadable but still fluid.
The frosting should coat a spoon but still pour slowly.
Step 5: Assemble the Cake
Now comes the satisfying part.
- Place first layer on serving plate.
- Spread a thin coat of warm frosting.
- Add next layer.
- Repeat until stacked.
- Frost top and sides completely.
Don’t worry if it looks slightly rustic — that’s part of its charm.
Refrigerate overnight before slicing.
Expert Tips for Perfect Results
If you want bakery-quality results, pay attention to these details:
- ✔ Use a kitchen scale for even layers
- ✔ Don’t overbake — thin layers dry quickly
- ✔ Trim uneven edges before stacking
- ✔ Frost while icing is slightly warm
- ✔ Chill before slicing for clean cuts
Common Mistakes to Avoid
Even experienced bakers can slip up. Watch out for:
- Thick layers – defeats the cake’s purpose.
- Overcooked frosting – turns grainy.
- Assembling while warm – causes sliding.
- Skipping chill time – affects texture.
- Uneven batter distribution – creates leaning stacks.
Take your time and embrace the process.
Delicious Variations of Smith Island Cake
While the classic chocolate-frosted yellow cake remains iconic, you can experiment carefully.

Coconut Smith Island Cake
- Add coconut extract.
- Use coconut milk in frosting.
- Sprinkle toasted coconut between layers.
Peanut Butter Chocolate Version
- Swirl peanut butter into frosting.
- Add crushed peanuts between layers.
Salted Caramel Variation
- Replace chocolate frosting with cooked caramel icing.
- Finish with flaky sea salt.
Lemon Layer Adaptation
- Add lemon zest to batter.
- Pair with light chocolate glaze or vanilla icing.
Just remember: thin layers are non-negotiable.
Storage, Freezing, and Make-Ahead Tips
One of the best things about this Smith Island cake recipe is flexibility.
Storage
- Refrigerate in airtight container.
- Keeps fresh up to 5 days.
Freezing
- Wrap slices individually.
- Freeze up to 3 months.
- Thaw overnight in refrigerator.
Make Ahead
Bake layers 1–2 days early. Assemble the day before serving for best flavor.
Nutritional Overview (Approximate Per Slice)
While this cake is indulgent, here’s a rough breakdown per slice (based on 12 servings):
- Calories: 450–500
- Carbohydrates: 65g
- Fat: 20g
- Sugar: 50g
- Protein: 5g
Remember, this is celebration food — meant to be savored.
Frequently Asked Questions About Smith Island Cake Recipe

What makes a Smith Island cake recipe different from other layer cake recipes?
Unlike traditional cakes with 2–3 thick layers, this cake features 8–15 ultra-thin layers and uses cooked fudge frosting instead of buttercream.
How many layers should a traditional Smith Island cake recipe have?
Most authentic versions have at least 8 layers, though some reach 12 or more. The higher the stack, the more dramatic the presentation.
Can you make the Smith Island cake recipe ahead of time?
Yes — and you should. The cake tastes better after resting overnight because the frosting softens the layers.
Is Smith Island cake always chocolate?
Traditionally, yes. The chocolate fudge frosting is signature. However, modern variations experiment with caramel and other flavors.
Why is this cake so important in Maryland?
Because of its deep roots in the isolated fishing communities of Smith Island, it represents resilience, creativity, and hospitality. Its designation as Maryland’s official state dessert solidified its cultural value.
Bringing Coastal Tradition Into Your Kitchen
When you bake this Smith Island cake recipe, you’re doing more than following steps. You’re practicing patience. You’re stacking care between every layer. You’re choosing tradition over shortcuts.
And when you cut into that tall, striped slice and see the perfect chocolate-lined layers, you’ll feel it — that quiet satisfaction that only comes from making something truly special.
So here’s your next step:
- Gather your ingredients.
- Set aside an afternoon.
- Invite someone you love to share it with you.
Because some recipes are meant to be experienced, not rushed.
If you found this guide helpful, save it, share it, and try the recipe this week. Then come back and tell us how many layers you stacked — 8, 10, or 12?
Your kitchen is ready. Now it’s your turn to bake a piece of history.